Monday, August 31, 2009

Quilt Along | 1. Fabric Requirements

Note: this is a re-post of something I wrote in the Flickr thread.  I am copying it here for my blog readers who may have missed the thread.

Actually, I'd rather call it fabric "suggestions" rather than "requirements"! It's been difficult trying to figure out how much fabric would be needed for this round, since wonky / improvisational blocks are so free-form and, well, improvisational! There are no set patterns here from which to measure fabric amounts.

I've given it my best shot, but the caveat here is that you might have some fabric left over -- that's not the worst thing in the world, right? I'd rather err on the side of having too much fabric than too little. Plus, you'll have a stash of strips for future wonky log cabin projects!

I'm making a few assumptions here:

- The blocks will be either 12.5" square or 15.5" square (more on that later).

- We'll make 25 blocks ... for a quilt that's laid out in a 5x5 grid. Of course, you can make your quilt bigger or smaller if you'd prefer. Adjust your fabric amounts accordingly!

- I'm not accounting for any borders. If you think you'd like to add any borders to the outside of your quilt, be sure to add that border fabric to your total amount. 

So, with all that being said, I am 
recommending that you have 16-20 fat quarters for this project (depending on how scrappy you want your quilt to be). Of course, if you want your fabric assortment to be more limited, you can convert this to yardage equivalents (i.e. 8-10 half yard cuts, or 4-5 yard cuts).

I just took a look back at Amy's fabric requirements for the zig-zag quilt. For a throw-sized quilt, that project required 15 fq's ... so I feel like we're on the right track. If you want to be conservative, you can start with 15 for this project, too.

I'm also going to stick with Amy's estimates of 3 yards for backing (or equivalent, if you like pieced backs) , and 1/2 yard for binding.

Also, 
and I cannot stress this enough, I REALLY REALLY REALLY REALLY REALLY REALLY recommend that you pick up a 12.5" square cutting ruler (like this) if you don't already have one. It is my must-have, go-to tool for projects like this. It's a great use of a 40% off coupon at Joann's, if you live near one of those. If not, maybe group members can share their favorite sources for buying tools like this.

Finally, if you want your blocks to "float" similarly to the ones in
this quilt, please keep reading:

If you go this route, we will be making 15.5" blocks. All you have to do is add 1.5 yards of a solid of your choice for the outer borders of your blocks. White is always classic, but I've seen people experiment with other solids, often with stunning results. You might also consider alternative fabrics (e.g. linen) for uses like this. Read this post ... it's great.

OK, I am sure I've forgotten something. Questions? Fire away! 

Wonky September | Quilt along with me!

Have you guys ever visited Dana at the Old Red Barn Company? Besides being a super cool chick, she has started a quilt-along group over in Flickr that has gained quite a following.

Back in May, Dana led a fantastic quilt along for a beginner-friendly rail fence quilt. Because the pattern was fairly simple yet resulted in such a striking quilt, it attracted both old and new quilters alike ... which I think is just great. (You may remember that I posed some pictures of my work-in-progress here. Yeah, I haven't really gotten much further than that, unfortunately!)

You can see all of Dana's quilt along posts compiled here.

Well, when Dana's quilt-along was over, the group wouldn't just let her walk away. Oh no. They demanded a second quilt-along. Amy (aka Park City Girl) stepped up and offered to lead a zig-zag quilt along. In typical Amy style, she did a wonderful job leading the group through the creation of even more beautiful quilts.

Want to make a zig-zag quilt of your own? Check out Amy's easy-to-follow instructions here.

Well, let me tell you ... the group has taken on a life of its own. Its members are hungry ... no, VORACIOUS ... for more, mOrE, MORE QUILTS! So when round 2 ended, they did not go quietly.

They demanded another quilt along.

They screamed for another leader.

They begged for a wonky log cabin quilt instructions.

And then Dana nominated ... me. And I accepted the challenge.

So, I hereby declare next month WONKY SEPTEMBER! Starting tomorrow (September 1st), I will be posting a series of tutorials over the coming weeks on making your own wonky log cabin quilt. This is by no means my own personal pattern -- I can hardly take credit for the wonky log cabin block! -- but I hope I can inspire some people to try something new by helping them to take it one step at a time, sharing some of my tips and tricks along the way.

Won't you quilt along with me? If you're interested, all you need are a bunch of fat quarters (around 16 or so ... or the equivalent in yardage cuts). It could be a great stash-buster, and also a great holiday gift idea.

Be sure to also join the Flickr group. Here's the link. I want to see it all -- from your fabric selections to your progress to your final quilts.

And in case you need some inspiration, here's a round-up of all of the log cabin projects I've made ... some are wonkier than others ...

Sunday, August 30, 2009

Tea Towel Tour ... (pssst!! giveaway inside!)

Whew!  Another jam-packed weekend gone by waaaaaay too quickly.  I hope yours was a good one!  Before moving on to my crafty updates, some news: sadly, the Frogs suffered a devastating 5-0 defeat in their season opener.  But since they don't keep score, I guess that doesn't matter!  Still, aren't they the two cutest frogs you've ever seen?:


While Mrs. Quilt Dad was performing her Assistant Coach-y duties, the little one and I explored the soccer fields.  Here's the little bugger when I tried to take his picture:


What can I say?  The little guy takes after his dad!

A few posts ago, I mentioned that I was dabbling a bit in embroidery.  Here's some progress that I've made on the piece I showed last time:


I've been so excited about working on this stuff that I actually went ahead and joined an embroidery swap!  (For those of you who read my blog, that's really no surprise, is it??  : )  Yes, it seems that the bug has bitten.  It's called the Tea Towel Tour and it's hosted over on Craftster.  I first learned about this swap from my crafty pal Rita, and I was excited to hear that another round was opening up.

The premise is simple ... everyone in the swap is placed into groups of 6.  A small towel (or napkin, or apron, or pillowcase, or whatever) travels from swapper to swapper, collecting a small embroidered design at each stop along the way.

Here's my piece.  I started it with a small picture of an octopus, and then bound it with one of my favorite Flea Market Fancy prints.  The cloth napkin is a really soft sage green and the pattern is by Andrea Zuill, who writes the awesome Badbird blog.


I've asked my fellow swappers to stick to an oceanic / underwater theme.  I'm so excited to see what they come up with!


If you want to follow along with the action or check out the work from the prior tours, visit us in the Flickr group.


I'm a researcher by nature, so when I want to learn something new I tend to read as much about it as possible.  I had some leftover gift card balance at Amazon, so I ordered a couple of books to give me some tips and inspiration:


Wait!  What's that?  It looks like I accidentally added 2 of the "Doodle Stitching" books to my cart!  Rather than sending it back to Amazon, I took it as a sign that it was time for a giveaway.

So, if you are a quilter that's been itching to try your hand at embroidery (like I was) and think this great book would give you the inspiration you need to get started, leave me a comment and you'll be entered to win!  Just tell me how you'd like to use your new embroidery skills, or what kind of project you think you'd like to make.  I'll even throw some extra goodies in with the book.


I'll pick a winner (via the Random Number Generator) on Thursday, September 3rd.  Good luck, and spread the word!!

Friday, August 28, 2009

My MBS Debut!


Yes, it's true! As of this morning, I am the Moda Bake Shop's newest designer! I am just so very excited to be included among so many talented quilters and sewists. This is such a personal accomplishment for me!

My first tutorial (though hopefully not my last) is for a quick & easy table runner that packs a punch through the deliberate placement of color and value. I hope y'all like it.


Head on over to the Moda Bake Shop, check it out, and let me know what you think. I'd love to hear your feedback ... but seeing as it is my first time trying to write any type of project instructions, please be gentle! If you make one, I'd love to see it. Also, be sure to add it to the MBS Flickr pool!

I've got a few more things up my sleeves, so stay tuned ...

Monday, August 24, 2009

Pimp my Moleskines


I'm not sure if I've ever mentioned it before but, even though I am not a trained designer myself, I manage a small team of graphic designers in my "real" job. They've been working their butts off lately in preparation for a big event we have coming up in a few weeks, so I decided yesterday to make something for them to show my appreciation.


They are the ones who first introduced me to Moleskines, so I couldn't think of anything more appropriate than some fabric covered ones! I found the tutorial over on Wise Craft. They were super easy and a great use of scrap fabrics. All you need is some double-sided fusible bond. A GREAT Christmas gift idea, I think!


Also, for all you Amy Butler fans out there, Kelly from I Have A Notion reached out to me this weekend to let me know about a fun contest she has going on over at her blog. YOU could be the designer of the name badge worn by Amy and her whole team at the upcoming quilt market in Houston! Besides the awesome bragging rights, if your design is chosen you will also win some of Amy's patterns, stationary, and other goodies.

You can find all the details here:
Amy Butler Tag Challenge

Best wishes for a great week ahead!

Saturday, August 15, 2009

Ponyo, Bag-Making, and Dipping My Toes in the Waters of Embroidery


Happy Saturday, everyone! I hope you're enjoying your weekend.

Before I get to any sewing pics, just wanted to share that we took the kids to see "Ponyo" today. What a beautiful, sweet little movie. I wasn't quite sure what to expect, and I wasn't sure if it would hold my kids' attention -- we've never seen a Miyazaki movie before, despite all of the good things I've heard -- but they sat through the entire thing! I thoroughly enjoyed it, too ... so I wouldn't hesitate to recommend it! Is it weird that I saw great ideas for quilt fabric colors and patterns throughout the entire movie ... ??


Quilt blocks took a bit of a backseat this week to some bags. It all started when my sister-in-law asked me to make her a bag. She is getting ready to start taking golf lessons, and she wanted a pretty, feminine bag to carry her golf shoes in. I said "sure", but wasn't really sure what to make. I haven't attempted zippers yet, so I was looking for something to help me avoid them.

Then I came across the Charming Drawstring Beach Bag tutorial over at the Moda Bake Shop. It seemed perfect! I had a charm pack of Soiree on hand, so I quickly pulled this together:


I think it turned out great! It was super easy to make. And I appreciate the fact that it's machine-washable, since those golf spikes will undoubtedly get a bit muddy from time to time.


I was also inspired recently by Kathy of Pink Chalk Studios' blog post about the "Easiest Accessory Bags Ever" pattern by Fig Tree Quilts. That Kathy is a marketing genius ... it didn't take long for me to have that pattern (and some Aiden Natural Linen to go with it) in my shopping cart.


I had already made a smaller sized bag from the pattern as a thank-you gift for my mom for watching the kids a few weeks back. (Bummer I didn't get a picture of it -- I made it out of "Patisserie" and it was really, really nice ... if I do say so myself!). This time I decided to make the large laundry bag. I found 2 fat quarters of some orange "Summer in the City" prints in my wife's pile of fabrics that she had purchased a while back for her bag-making and decided to put them to good use.

Finally, because I was on such a tear, I decided to make another little Bake Shop bag, but this time I adjusted the pattern a bit. I happened to have 18 charm squares of "Neptune" laying around, and adjusted the dimensions of the bag to make it a bit narrower, a bit shorter, and I used some cuts of linen for the bottom instead of a row of charm squares.

I love how this one came out. It might just become a special carrier for my Doll Quilt Swap quilt!


There wasn't just bag-sewing going on at Casa Quilt Dad this week. Here are two little 5.5" square blocks that I made this week for Sudi-Laura, the winner of this month's "Baggie Bingo" draw over at the Mini Quilt in a Bag swap group:


Gotta love that Deer Valley!
Finally, I mentioned in my last post that I've been experimenting with something new -- embroidery! I've been really inspired by folks who incorporate embroidery into their quilt designs (see this and this and this and -- especially -- this), so I thought it might be a good skill to add to my repertoire!

I thought I'd start out small with a pillow. I asked my daughter what she might like on a pillow, and she said a cat. So I pulled this pattern from the "Sublime Stitching" book and got to work.


Not too shabby for a first-timer, eh? I think I cut the fabric a little too close to the yellow border, but oh well. The funniest part? As soon as I finished, my daughter informed me that she doesn't like cats anymore. Now she wants a unicorn. With 2 daughters, I guess I'd better get used to that. I think there's enough space in between the cat's feet and the yellow border to embroider a little girl's name. Maybe this will become a baby gift ...

(Great free embroidery patterns here, by the way.)

Before I get started on the unicorn, I have to finish this. Yes, I've already started a second embroidery project. No intended recipient in mind yet ... just want to keep practicing. I was TOTALLY inspired by this (and this and this). Free pattern here.


How about you? Been itching to try anything new lately?

Wednesday, August 12, 2009

July Quilting Bee Blocks

Fortunately for me, I was able to get back on track and whip through my July quilting bee blocks. They've all been mailed ... albeit a few days late. Want to see what I've been working on?

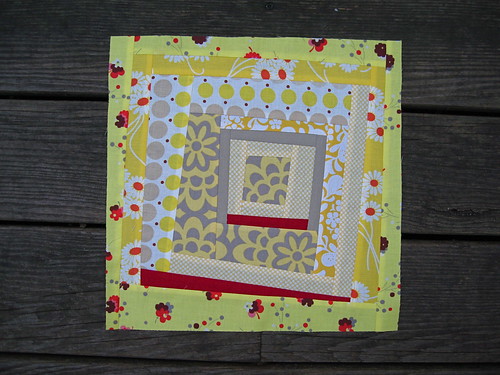
First, here's Adina's block for the Cottage Quilting Bee. Adina sent lots of Amy Butler prints (yay!) and some coordinates. She asked for a particular block design, and here it is:


I love the way her fabrics all play off of one another. I didn't get the strips to match up (I think I figured out why after the fact) ... but a quick glimpse through the Flickr pool revealed that most people's don't match up. I hope that's OK with Adina! I still think it's going to be a rockin' quilt.

Remember these two boo-boo blocks that I made for Tina, also for the CQB?:


Luckily, I was able to eke out a third block from Tina's remaining fabrics. (It helped that I had a few of the same prints in my stash!) I was thrilled to see that, even though I was working under some constraints, I don't think the block suffered at all. In fact, I quite like how it turned out ... maybe even more so than the first two!


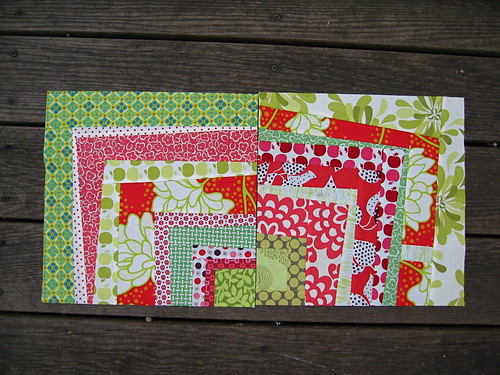
I LOVE these next two blocks. Quilting Barbie, a fellow bee inspired bee, sent some reds and greens drawn from her inspiration fabric (from Heather Bailey's Pop Garden line). She asked for wonky quarter-log cabin blocks, which is one of my favorites. After double-checking (this time!), I saw that we were free to add fabrics from our stash. Here are the two blocks I came up with:


I really can't wait to see Barb's quilt all put together. I was so jazzed about Barb's blocks that I asked for the same thing from my SewConnected 3 peeps. August is my month in that group, and I cut up and sent out all of the Good Folks fat quarters that I've been hoarding for the past few months.

Speaking of SewConnected 3, July was Darci's month over there and wait until you see her blocks! I know I just said that quarter-log cabins are one of my favorite blocks to make, but string blocks are right up there, too! Darci sent strips of fabric from and inspired by the Park Slope line and asked for string blocks. Here are the two I was able to make for her:


Darci asked us to use paper foundations for these blocks and, if you've been reading my blog, you know that I am paper-piecing-averse. I've always used muslin foundations when making string blocks, so taking that leap to paper was HUGE for me! I ripped out pages from my phone book to use because I read somewhere that they tear off pretty easily. I am happy to report that my first time using paper foundations was a success! I think I've been making much ado about nothing.

Over in SewConnected 2, Emily (a local Raleigh quilter and pattern designer) sent all of us some Deer Valley fabrics to play with for her blocks ... and, as a huge fan, you know how happy that made me! Emily didn't have any specific requests, except that she wanted something modern / non-traditional and in any multiple of 5". I decided to feature the bird in this 10" x 15" rectangular block:


I'd be happy just to hang this block in my sewing space ... or anywhere else in my home, for that matter! I hope Emily likes it. I know I am going to be totally envious of her final quilt.

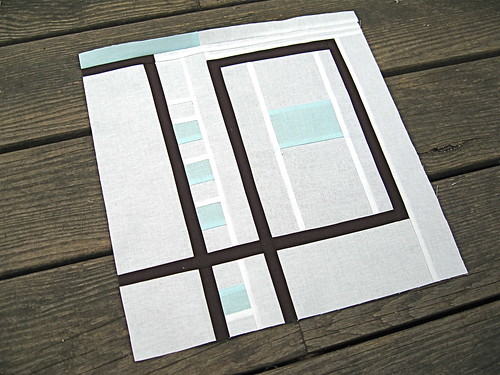
And speaking of non-traditional and modern blocks, Jacquie really threw a challenge out to the SewConnected group. She envisioned a quilt based on this painting by her son and, with some very loose guidelines, sent us all a few solids to interpret it as we saw fit. Here's my take:


You should really go take a quick look at the SewConnected pool and see the blocks that everyone has created for Jacquie so far ... I think know her quilt is going to be amazing.

I haven't started working on any August blocks yet, but I have been pretty productive the last couple of days. Besides working on a few super-secret projects, I've been on a bit of a bag bender ... 3 bags whipped up in the last few days (pics soon, I hope) ... and have also been dabbling in (gasp!) embroidery. Lots to share in the next couple of days, provided the rain stops and I can get some decent pictures. I really, really need to figure out how to take decent pictures inside of my house ... any tips for me??

Random snippet into my life: lately I've grown addicted to Kings of Leon Radio on Pandora and (surprisingly, because I've never been a coffee drinker) Starbucks Iced Caramel Macchiatos. That's about all that's new here.

Oh, and I was at my local JoAnn's today and the woman cutting my fabric totally recognized me from my blog! Hi Grizelle! Isn't that funny?

Sunday, August 2, 2009

krommama's Placemat Swap

Thanks so much for all of your well wishes for my daughter. I am happy to report that her surgery on Friday went well and, aside from being a bit out of sorts all day on Friday due to the lingering effects of the anesthesia, she's been doing great. I am glad to have all of that excitement out of the way.

I'm also happy to report that my creative mojo seems to have returned! After the kids were tucked in bed last night, I got busy. I managed to make 4 quilting bee blocks and also cut up my fabric to send to my SewConnected 3 pals. If I can knock another 2 or 3 blocks out today, and get all of my SC3 envelopes addressed, then I will pretty much be all caught up. What a great way to start the week! Pics to come soon, if the rain will stop ...

Now, for some catching up:

I participated in Sarah's Placemat Quilt Swap last month on Flickr. What's a placemat quilt, you might ask? Well, it's a quilted placemat, silly! Not much different than a mini quilt, in fact, but the quilters must all pledge not to get too upset if they see their creations with some peanut butter & jelly or maple syrup stains (the two most common in my house) on it.

I was paired with Rachel, a very talented quilter who blogs at 2nd Ave. Studio. Here is the placemat that she made for me:

(pics from Rachel's photostream)

I LOVE it! The design is simple yet so effective. The colors are so spot on to my tastes -- that background color is a beautiful earth brown. And the quilting? ... OMG, the quilting is simply amazing. It's an all-over design of small swirlies in variegated thread. It gives the quilt -- errr, placemat -- such a nice texture.


See that mini border right inside the binding? What a great idea! I think I'll totally be copying that one, Rachel!

One of the big discussions in the Flickr group is, "will you use it?" (meaning the placemat). I am happy to report that I am already using mine! You see, we recently got a brand new desk for our office. I was afraid that our computer keyboard would scratch the desk top. Well, I placed my new placemat underneath the keyboard and I am using it -- and looking at it -- as I type ... and will every time we use the computer!

Here's a snippet of the placemat that I sent to Rachel:


A few months back, I won a giveaway over at Blue Nickel Studios and received a few fat quarters of the (at the time) not-yet-released "Monaco" line by Free Spirit Fabrics. I made up a spiky design of my own and, trying to use the FQ's only and not have to buy any additional fabrics, bound it with a scrappy binding.


Here's the back -- I definitely wanted to give the peacocks a starring role:


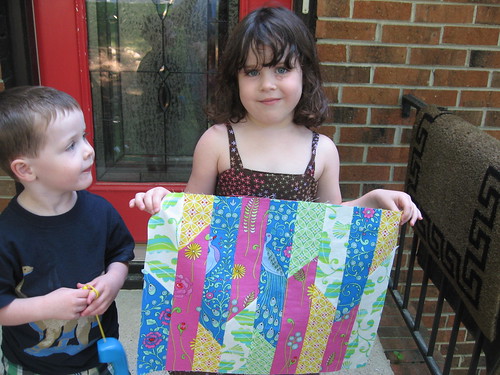
And here's Sean & Bevin helping me show it off before I packaged it up for Rachel:


The design is admittedly very simple, but I was thinking of writing it up along with a coordinating table runner as a tutorial ... what do you think? Would anyone be interested?

Finally, let me end with some recent inspiration. I have 3 or 4 ideas for my DQS7 quilt knocking around in my head right now, but I think this one is winning out. I'm digging these pillows from Anthropologie, and think that a scrappy, fused applique mini quilt inspired by their designs might just be amazing. I saw that both Allison at Cluck Cluck Sew and the artsy-crafy babe were both also inspired by these pillows, and their interpretations turned out great.
What do you think?